Cookies

Notice: This website may or may not use or set cookies used by Google Ad-sense or other third party companies. If you do not wish to have cookies downloaded to your computer, please disable cookie use in your browser. Thank You.

Monday, August 30, 2010

My Survival Vest


This is my version of a survival vest, which can augment a bug-out bag if needed. You don't have to go to this extreme, but for me its a piece of mind when I'm away from home. You may have your own idea of what a survival vest should consist of and that's great. At least you are thinking and hopefully putting together your own type of vest or kit. It is better to have something than nothing.

Each pocket of the vest is labeled with a letter. Below is a list of what I carry in those pockets.  The vest weighs about 23 lbs. depending on season. The vest was sprayed with a water proofing spray used for canvas tents and outdoor clothing.

Front Of Vest
POCKET A:


Small first aid kit containing:
1 small Bic lighter
2 butterfly closures
6 band aids
(2) 2x2 sterile dressings
1 sting relief pad
1 double antibiotic ointment
3 antiseptic towelettes
1 moleskin
4 Motrin tablets
2 safety pins

POCKET B:


sharpening stone


1 knife sharpening stone

POCKET C:


#1- Compass with magnifying glass
#2- Signal mirror

POCKET D:


#1- Pocket compass with thermometer and wind-chill chart
#2- Survival whistle
#3- Heavy duty aluminum foil 2' x 2'
#4- Wisp toothbrush with toothpaste (4 in one pack)
#5- 3 each REV-3 energy drink powder (lemon flavor)
#6- 1 each bar of soap (motel size)


POCKET E:


#1- Snake bite kit
#2- Aloe gel lotion and sun block cream
#3- Aspirin, Motrin, and Imodium tablets
#4- Extra band aids
#5- Water purification tablets
#6- Carmex lip balm
#7- Medical tape
#8- Toilet paper (3each)
#9- Alcohol towelettes
#10- Micro light
#11- Bic lighter
#12- Leatherman micro tool

POCKET F:


#1- Water proof container (contains meds needed on daily basis, i.e. high blood pressure pills, etc.)
#2- Magnesium fire stick
#3- D-ring for rappelling
#4- Fire striker fire starter
#5- Back up pocket knife with assorted add-ons.
#6-  Extra 10 rounds of .22 cal and 3 rounds of #4 shot .410 shells for my M6 Scout survival rifle. Kept in a mint tin with gauze to prevent shifting around. Outer edge is seal with electrical tape to help keep dirt and moisture out.  (Replace with ammo of your choice)
#7- Pencil wrapped with 3 feet of electrical tape.

POCKET G:


#1- Survival fishing kit: hooks, line and sinkers.
#2- Spare knife sharpening stone.
#3- Mini flashlight (diode bulb type) with spare batteries.
#4- 2 each fruit energy bars (Ten X- Blast).
#5- Monocular with case.
#6- Cell phone (not shown).

POCKET H:


#1- Tri-bandage arm sling. Can also be used as a pirate type head gear like I wear in my videos and when I'm out and about in the wilderness.
#2- Compressed bandage with attached gauge.
#3- Snares made from snare wire 6 each.
#4- Baggie containing dryer lint for fire starting.
#5- Extra heavy duty aluminum foil 2' x 3' sheet folded. (Can be used for a cooking container or wrapping food for later.)
#6- 2 each drinking straws with 2 inches cut off to fit pockets.
#7- Hand saw.


Inner Vest Posckets

POCKET I-


1 Each light weight rain poncho.

POCKET J-


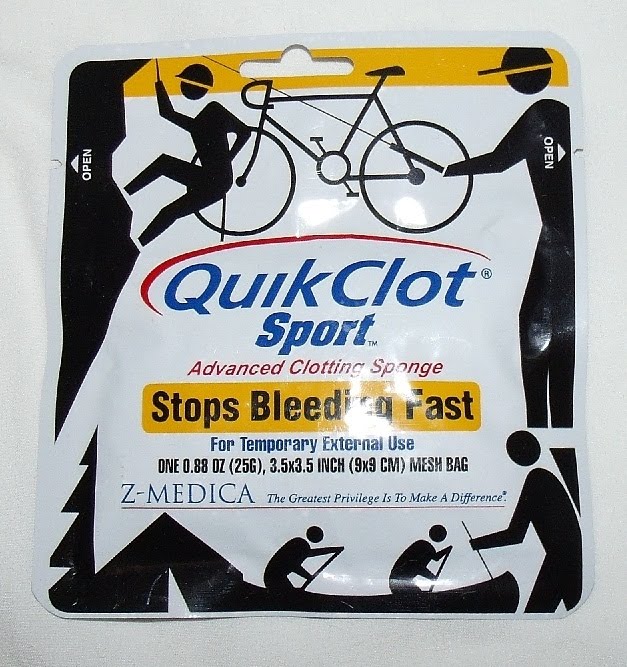
1 each QuikClot sport pak. Used for serious bleeding.

POCKET K-


1 Each Tube tent (two person capacity)

POCKET L-


#1- SAS Desert survival handbook.
#2- Water proof notebook for taking notes, leaving notes, etc.

POCKET M-


2 Each one gallon clear plastic baggies; 3 each one quart clear plastic baggies. (can be used to store water or food or for what ever needs to stored.
1 Pair of thin leather gloves (not show)


Rear Vest Pockets

POCKET N-


#1- Aquamaria portable water filter straw. This product with clean 20 gallons of water.
#2- 50 feet of 550 para-chord.
#3- Dental floss, waxed.  Good for cleaning your teeth, cordage, and for tying feathers and arrow tips for making arrows.
#4- Off mosquito liquid.
#5- Clear plastic tube with lid and 3 feet of rolled duct tape. The clear tube can be used to store extra medication, char cloth, cotton balls cover in Vaseline for fire starting, needle and thread, etc.
#6- Glow in the dark chem-lite, green in color, 6 hours of usable light.

POCKET O-


#1- Mosquito head net.
#2- Emergency space blanket.

POCKET P-


#1- 1 quart sandwich baggie containing: 1 packet chicken soup; 1 packet French onion soup; 1 packet cream of celery soup; 1 packet orange powder drink; 1 packet raspberry powder drink; 1 packet instant vegetable rice; 2 tea bags; 1 instant coffee packet; 1 creamer packet; 1 salt packet; 4 sugar packets; 2 wet napkin packets.
#2- 1 mint tin containing: 6 chicken bullion cubes; 2 salt packets; 1 sugar packet; 1 creamer packet; 1 instant coffee packet; 1 packet Tabasco sauce; 1 hard candy; 1 packet gum.
--------------------------------------------------------------------

The following survival items are not in the vest, but are with me on my belt or carried in my pack when I know I'm going to be in the wilderness:


M6 Scout Survival Rifle


The M6 Scout Survival Rifle is no longer manufactured. You might get lucky and find one at a gun show or pawn shop. This rifle is a .22 cal, .410 cal over and under barrel configuration. Its has a magazine that carries (15) .22 cal ammo and (4) .410 cal ammo.  Its folds in half and fits perfect in my bug-out bag or hiking backpack.
--------------------------------------------------------------------
Smith & Wesson Homeland Security

This is my survival knife of choice. Its stays with my vest as a companion item and is worn on my belt or attached to the vest when in storage. The blade is Titanium .440 steel. Its is very durable, keeps a good edge and fits well in my hand. The sheath is well built with a diamond studded sharpener attached.

----------------------------------------------------------------------
Winchester Multi tool
At a minimum I carry a multi-tool on my belt and a small pocket knife in my pocket. I am partial to Winchester and Leatherman multi-tools because they a very sturdy and have not failed me yet.

-------------------------------------------------------------
Some other items to add would be an extra pair of reading glasses if you are not able to see without them. They should be stored in a crush proof case.

Just remember that when designing your survival vest and kits that they address the following needs:

1. Fire Starting
2. Signaling
3. Food procurement (i.e., knife, cordage, etc.)
4. Water procurement, purification and storage
5. Shelter building (i.e., cordage)
6. Navigation (i.e., compass or GPS)
7. Basic medical needs

Stay Prepared!  Stay Alive

Charlie

How To Make A Quail Call


Quail Call
A 'Quail Call" can be used in conjunction with the Box Trap to lure the quail near or into the trap.

During certain parts of the year Quail may not call.  Listen to your surroundings and if you are hearing Quails calling to each other, then you stand a good chance of calling them toward your trap.


Quail Species

Habitat:

Resident in the Sonoran desert of Arizona and Mexico, extending into southern New Mexico, up and down the Rio Grande, up the Colorado River drainage into Utah’s canyon country, and west to California and southern Nevada. Preferred habitats include bushy and thorny vegetation of southwestern deserts.

Food:

Quail like the seeds of annual forbs and grasses such as snakeweed (Gutierrezia spp.), croton (Croton spp.), pigweed (Amaranthus spp.), bristlegrass (Setaria spp.), and panicgrass (Panicum spp.) are essential food sources for quail. They sometimes comprise70% of a quail’s annual diet. Green vegetation such as filaree or storksbill (Erodium spp.) and kochia (Kochia scoparium) becomes essential food in the late winter, early spring, and summer months by improving quail body condition and thereby improving nesting success.

Succulent fruits from Christmas cactus (Opuntia lepticaulis) and pricklypear cactus (Opuntia spp.) are eaten in the summer and fall. In the fall, Gambel’s quail often eat mistletoe berries from cottonwood and oak trees. Ironically, many plants favored by quail are considered weed species and emerge after soil disturbances.

Insects, often eaten by adults, are critical to nourishing young chicks. Insects are considered the ideal quail food providing protein, energy, and water. Managing for a diversity of forges (broad-leafed weeds) will provide an abundance of insects and seeds.

Cover:

Adequate cover is an essential component of quail habitat. Cover refers to the structure of the habitat. When differing cover types are provided, food and water generally are not a limiting factor. Necessary types of cover include nesting, brooding, loafing, roosting, escape and thermo-regulation (providing shade, warmth, or cover from adverse weather conditions, i.e. hail).

Nesting cover is extremely important and is typically associated with grasses that form a canopy over the nest, protecting it from the sun and rain and concealing the hen while she is incubating. Examples of nesting cover plants are bunchgrasses and bluestem (Andropogon, Bothriochloa, and Schizachyrium spp.), switchgrass (Panicum virgatum), and tobosagrass (Hilaria mutica).
(Source: New Mexico Game and Fish Dept.)


Stay Prepared! Stay Alive!

Charlie

The Box Trap


Box Trap (with pull trigger)


The 'Box Trap' is mainly used for catching birds, although small mammals can also be caught in this trap, such as a rabbit. 

This box trap configuration uses the pull trigger system.  Basically, a string is attached to the pull trigger and you are on the other end watch for an animal to enter.  Weight should be added to the top of the box if you expect to catch rabbits or the like.  If a rabbit enters and is trapped, immediately subdue the trap so that the animal does not escape.

A figure-four trigger mechanism can be used in place of the pull trigger in the event you want to set up several of these traps or others and do not want to or have the time to sit on a trap.

If you are not going to be watching these traps, the four base sticks of the trap should be ties together at each corner to give it more stability and a better chance of keeping the game contained.

Remember, once the traps have done their job, either use the wood for your cooking fire, or dismantle them so that no unwanted game is trapped and suffers needlessly.

Stay Prepared! Stay Alive!

Charlie

Saturday, August 28, 2010

Vegetation Bag Still


Vegetation Bag With Drinking Tube Added

Things to remember:

1. Do not use poisonous plants. When in doubt- do without.
2. Clean as much dirt and debris off the plant material as possible to prevent it from ending up in your water.
3. The water may taste like the plant smells.
4. It may take up to as long as 8 hours or more to obtain a little less than a quarter pint of water.
5. The plastic bag must be clear and air tight.

Note: The plant (Desert Marigold) used in the video demonstration is toxic to sheep and goats, but not to cattle or horses. I have not found any info stating that this plant is toxic to humans, although researchers are studying this plant in cancer research. So, when in doubt I would not use this plant until I knew for sure it was safe.

Stay Prepared! Stay Alive!

Charlie

Yucca Root Soap


The Yucca root contains saponins, which causes the soaping action. Yucca soap is great for washing hair helping to control dandruff and hair loss. Yucca soap can be used to wash clothes as well.

The saponins contained in the Yucca root is poisonous to smaller animals, such as fish.

The Yucca root has antitumor, antifungal and antiarthritic properties. A poultice made from the Yucca root was used to stop bleeding from wounds.

Yucca is rich in Vitamin A, B-complex, and contains some Vitamin C. It is also high in calcium, potassium, phosphorus, iron, manganese and copper. Contains precursors to cortisone, and improves the body's ability to manufacture its own cortisone.

The Yucca is one great resource found in the desert.

Stay Prepared! Stay Alive!

Charlie

Thursday, August 26, 2010

Yucca Needle and Thread

Yucca Needle


In an emergency or survival situation, the Yucca leaf can be used to fabricate a rudimentary needle and thread.  Yucca plants with the broad style leaf work better than those with the thin leaf, although the latter can be used.

Remove a leaf from the Yucca plant, cutting it at its base to maximize the length.  Being careful not to damage the needle tip of the leaf, take a rock and pulverize the leaf from the base of the point all the way down the length of the leaf.

Do not pound too hard as this can damage the fibers making the thread weak or useless. Next, using a knife or sharp rock, cut around the base of the needle to where a few fiber strands are still connected to the needle tip.

If water is available, you can wash the leaf by rolling it lengthwise between both hands.  This not only allows you to separate the needle with thread attached, you now have fibers that you can use to twist into cordage.

If no water is available, carefully separate the fibers at the base of the needle to where one strong strand remains at the base of the needle. The needle tip can be carved around the edges if it is too thick.A small pocket knife makes easy work of this.

Tie a knot at the bottom of the thread opposite the needle end.  You can now use this Yucca needle and thread to repair a torn jacket or ripped jeans, which should hold long enough to get them properly mended.  Make as many needles as needed to get the job done and carry spares.

Stay Prepared! Stay Alive!

Charlie

What Hemisphere Am I In?

Hemisphere Map
To determine what hemisphere you are in, look at the above hemisphere map. If you are in a country that is located in yellow, you are in the Northern Hemisphere. If you are in a country that is in white, you are in the Southern Hemisphere.

The Northern Hemisphere and a Southern Hemisphere are divided by the equator.

The Earth is also divided in Western and Eastern Hemispheres, which are divided by the Prime Meridian.

Stay Prepared! Stay Alive!

Charlie

Find Direction Using Watch Method

Northern Hemisphere
Northern Hemisphere:

To find direction while in the northern hemisphere point the hour hand of an analog type wrist watch at the sun. South is halfway between the hour hand and the 12 o’clock position.

Southern Hemisphere
Southern Hemisphere:

To find direction while in the southern hemisphere point the 12 o’clock position on your watch at the sun. North is halfway between the 12 o’clock position and the hour hand.

Note:  The United States is in the Northern Hemisphere.

Stay Prepared! Stay Alive!

Charlie

Wednesday, August 25, 2010

The Southern Cross

Southern Cross (Crux)
The Southern Skies

There is no "Pole Star" in the southern sky.

Like all stars and the stars that make up the Southern Cross rotate throughout the night around the South Celestial Pole. Since this motion is due to the earth spinning around they will complete one full circle in one day. This means the actual location of the Cross in the sky will depend on the time of night you try and observe it.

Because there is no star bright enough to be easily recognized near the south celestial pole, a constellation known as the Southern Cross is used to assist in locating South.

The Southern Cross consist of five stars. Its four brightest stars form a cross that tilts to one side. The two stars that make up the cross's long axis are the pointer stars.

To determine south, imagine a distance five times the distance between these stars and the point where this imaginary line ends is in the general direction of south. Look down to the horizon from this imaginary point and select a landmark to steer by.

Another method is to extend the long axis of the Cross below the Cross for as far as you like. Then, draw another line starting from half way between the two pointer stars and at 90 degrees to the line joining them. Where these two lines cross is once again roughly the South Celestial Pole. See the above diagram.

Finding the Southern Cross throughout the year:

If you were to look at one particular star at the same time each night however you would also notice that it appears to be in a slightly different position from night to night. This is because it rises approximately 4 minutes earlier each day.
 The Cross will appear in a different position in the sky depending on the time of year you look. Winter nights around April, May, June and July are the best times to look at the Cross of an early evening.

Look at the diagram below to determine the position of the Southern Cross at different times of the year.

Southern Cross Annual Positions

Once you have roughly located south, try to locate a landmark off in the distance to use for navigational purposes.

Stay Prepared! Stay Alive!

Charlie


Tuesday, August 24, 2010

Big Dipper

The Big Dipper
The Northern Sky


You can easily locate north, while traveling at night, by locating the Big Dipper. You must be in the northern hemisphere with a clear view of the night sky. The Big Dipper never sets below the horizon. The Big Dipper rotates around the north star (Polaris) and is visible in northern skies all the year round.

The Big Dipper is called Ursa Major (Great Bear in Latin). The Big Dipper is used to find the North Star, which is called Polaris or the polestar. The North Star forms part of the Little Dipper handle and can be confused with the Big Dipper.

The Big Dipper is a seven star constellation in the shape of a dipper. The two stars forming the outer lip of this dipper are the "pointer stars" because they point to the North Star. Mentally draw a line from the outer bottom star to the outer top star of the Big Dipper's bucket. Extend this line about five times the distance between the pointer stars. You will find the North Star along this line. The north star is the last star in the little dippers tail.

Try to pick out a landmark directly under the North Star to use for navigating.

Stay Prepared! Stay Alive!

Charlie

Solar Still

Solar Still


Before deciding to construct a solar still, you must understand that it takes approximately 45 minutes to construct one, which can zap a lot of calories and moisture in the process.

If you plan on staying in one place for a day or two in hopes that rescue is on the way, then building solar stills may be a viable solution if you are hurting on water resources.

The location you decide to construct a still should be in the open in a sunny location. The ground should be soft for digging and should contain moisture or moisture was present at some point in time. A good area would be in a dry river bed.

Construction Steps: (each solar still requires approximately a 6' x 6' sheet of plastic (clear plastic works better).

1. Dig a bowl-shaped hole in the soil about 40 inches in diameter and 20 inches deep.

2. Dig a smaller, deeper sump in the center bottom of the hole to accommodate the container. If polluted waters are to be purified, a small trough can be dug around the side of the hole about halfway down from the top. The trough ensures that the soil wet by the polluted water will be exposed to the sunlight and at the same time that the polluted water is prevented from running into the container.

If plant material is used, line the sides of the hole with pieces of plant or its fleshy stems and leaves. Avoid poisonous plants.

3. Place the plastic over the hole and put soil on the edges to hold it in place. Place a rock no larger than a golf ball in the center of the plastic until it is about 15 inches below ground level. The plastic will now have the shape of a cone.

4. Put more soil on the plastic around the rim of the hole to hold the cone securely in place and to prevent water-vapor loss. Straighten the plastic to form a neat cone with an angle of about 30 degrees so the water drops will run down and fall into the container.

It takes about 1 hour for the air to become saturated and start condensing on the underside of the plastic cone.

If you have a long enough rubber or plastic tubing, you can put on end of the tube into the container and run the other end under the plastic sheet and dirt to act as a straw. By doing this you can access the water in the container without having to continuously lift the plastic to get to the water.

Remember to plug the tube when not in use so that the moisture will not evaporate and so that the tube opening stays free of dirt.


Solar Still With Drinking Tube Installed


You will need at least four stills to meet your individual daily water intake needs. Its usually takes about 6-12 hours to obtain a quarter canteen cup of water and sometimes even longer.

Stay Prepared! Stay Alive!

Charlie

Tuesday, August 17, 2010

Knot Tying- Part 8


Transport Knot


TRANSPORT KNOT (OVERHAND SLIP KNOT/MULE KNOT)

The transport knot is used to secure the transport tightening system. It is simply an overhand slip knot.

a. Tying the Knot.

STEP 1. Pass the running end of the rope around the anchor point passing it back under the standing portion (leading to the far side anchor) forming a loop.
STEP 2. Form a bight with the running end of the rope. Pass over the standing portion and down through the loop and dress it down toward the anchor point.
STEP 3. Secure the knot by tying a half hitch around the standing portion with the bight.

---------------------------------------------------------------------


Water Knot


WATER KNOT

The water knot is used to attach two webbing ends. It is also called a ring bend, overhand retrace, or tape knot. It is used in runners and harnesses and is a joining knot.

a. Tying the Knot.

STEP 1. Tie an overhand knot in one of the ends.
STEP 2. Feed the other end back through the knot, following the path of the first rope in reverse.
STEP 3. Draw tight and pull all of the slack out of the knot. The remaining tails must extend at least 4 inches beyond the knot in both directions.

--------------------------------------------------------------------


Wireman's Knot


WIREMAN’S KNOT

The wireman’s knot forms a single, fixed loop in the middle of the rope. It is a middle rope knot.

a. Tying the Knot.

STEP 1. When tying this knot, face the anchor that the tie-off system will be tied to. Take up the slack from the anchor, and wrap two turns around the left hand (palm up) from left to right.
STEP 2. A loop of 30 centimeters is taken up in the second round turn to create the fixed loop of the knot.
STEP 3. Name the wraps from the palm to the fingertips: heel, palm, and fingertip.
STEP 4. Secure the palm wrap with the right thumb and forefinger, and place it over the heel wrap.
STEP 5. Secure the heel wrap and place it over the fingertip wrap.
STEP 6. Secure the fingertip wrap and place it over the palm wrap.
STEP 7. Secure the palm wrap and pull up to form a fixed loop.
STEP 8. Dress the knot down by pulling on the fixed loop and the two working ends.
STEP 9. Pull the working ends apart to finish the knot.

Stay Prepared! Stay Alive!

Charlie

Knot Tying- Part 7


Munter Hitch


MUNTER HITCH

The munter hitch, when used in conjunction with a pear-shaped locking carabiner, is used to form a mechanical belay.

a. Tying the Knot.

STEP 1. Hold the rope in both hands, palms down about 12 inches apart.
STEP 2. With the right hand, form a loop away from the body toward the left hand. Hold the loop with the left hand.
STEP 3. With the right hand, place the rope that comes from the bottom of the loop over the top of the loop.
STEP 4. Place the bight that has just been formed around the rope into the pear shaped carabiner. Lock the locking mechanism.

b. Check Points.

(1) A bight passes through the carabiner, with the closed end around the standing or running part of the rope.
(2) The carabiner is locked.

---------------------------------------------------------------


RAPPEL SEAT

The rappel seat is an improvised seat rappel harness made of rope. It usually requires a sling rope 14 feet or longer.

a. Tying the Knot.

STEP 1. Find the middle of the sling rope and make a bight.
STEP 2. Decide which hand will be used as the brake hand and place the bight on the opposite hip.
STEP 3. Reach around behind and grab a single strand of rope. Bring it around the waist to the front and tie two overhands on the other strand of rope, thus creating a loop around the waist.
STEP 4. Pass the two ends between the legs, ensuring they do not cross.
STEP 5. Pass the two ends up under the loop around the waist, bisecting the pocket flaps on the trousers. Pull up on the ropes, tightening the seat.
STEP 6. From rear to front, pass the two ends through the leg loops creating a half hitch on both hips.
STEP 7. Bring the longer of the two ends across the front to the nonbrake hand hip and secure the two ends with a square knot safetied with overhand knots. Tuck any excess rope in the pocket below the square knot.

----------------------------------------------------------

Square Knot


SQUARE KNOT

The square knot is used to tie the ends of two ropes of equal diameter. It is a joining knot.

a. Tying the Knot.

STEP 1. Holding one working end in each hand, place the working end in the right hand over the one in the left hand.
STEP 2. Pull it under and back over the top of the rope in the left hand.
STEP 3. Place the working end in the left hand over the one in the right hand and repeat STEP 2.
STEP 4. Dress the knot down and secure it with an overhand knot on each side of the square knot.

Stay Prepared! Stay Alive!
 
Charlie

Knot Tying- Part 6

Girth Hitch

GIRTH HITCH

The girth hitch is used to attach a runner to an anchor or piece of equipment. It is a special-purpose knot.

a. Tying the Knot.

STEP 1: Form a bight.
STEP 2: Bring the runner back through the bight.
STEP 3: Cinch the knot tightly.

------------------------------------------------------------------------

Guarde Knot


GUARDE KNOT

The guarde knot (ratchet knot, alpine clutch) is a special purpose knot primarily used for hauling systems or rescue. The knot works in only one direction and cannot be reversed while under load.

a. Tying the Knot.

STEP 1. Place a bight of rope into the two anchored carabiners (works best with two like carabiners, preferably ovals).
STEP 2. Take a loop of rope from the non-load side and place it down into the opposite cararabiner so that the rope comes out between the two carabiners.

-----------------------------------------------------------------------

Kleimhiest Knot


KLEIMHIEST KNOT

The Kleimhiest knot provides a moveable, easily adjustable, high-tension knot capable of holding extremely heavy loads while being pulled tight. It is a special-purpose knot.

a. Tying the Knot.

STEP 1. Using a utility rope or webbing offset the ends by 12 inches. With the ends offset, find the center of the rope and form a bight. Lay the bight over a horizontal rope.
STEP 2. Wrap the tails of the utility rope around the horizontal rope back toward the direction of pull. Wrap at least four complete turns.
STEP 3. With the remaining tails of the utility rope, pass them through the bight (see STEP 1).
STEP 4. Join the two ends of the tail with a joining knot.
STEP 5. Dress the knot down tightly so that all wraps are touching.

Note: Spectra should not be used for the Kleimhiest knot. It has a low melting point and tends to slip.

Stay Prepared! Stay Alive!
Charlie

Knot Tying- Part 5

End-of-the-Rope Prusik

End-of-the-Rope PRUSIK 

STEP 1. Using an arm’s length of rope, and place it over the long rope.
STEP 2. Form a complete round turn in the rope.
STEP 3. Cross over the standing part of the short rope with the working end of the short rope.
STEP 4. Lay the working end under the long rope.
STEP 5. Form a complete round turn in the rope, working back toward the middle of the knot.
STEP 6. There are four wraps and a locking bar running across them on the long rope. Dress the wraps and locking bar down. Ensure they are tight, parallel, and not twisted.
STEP 7. Finish the knot with a bowline to ensure that the Prusik knot will not slip out during periods of varying tension.

-----------------------------------------------------------------------

Middle-of-the-Rope Prusik

Middle-of-the-Rope PRUSIK

The middle-of-the-rope Prusik knot can be tied with a short rope to a long rope as follows:

STEP 1. Double the short rope, forming a bight, with the working ends even. Lay it over the long rope so that the closed end of the bight is 12 inches below the long rope and the remaining part of the rope (working ends) is the closest to the climber; spread the working end apart.
STEP 2. Reach down through the 12-inch bight. Pull up both of the working ends and lay them over the long rope. Repeat this process making sure that the working ends pass in the middle of the first two wraps. Now there are four wraps and a locking bar working across them on the long rope.
STEP 3. Dress the wraps and locking bar down to ensure they are tight and not twisted. Tying an overhand knot with both ropes will prevent the knot from slipping during periods of variable tension.

----------------------------------------------------------------------

Fisherman's Knot

FISHERMAN’S KNOT

The fisherman’s knot is used to tie two ropes of the same or approximately the same diameter. It is a joining knot.

a. Tying the Knot.

STEP 1. Tie an overhand knot in one end of the rope.
STEP 2. Pass the working end of the other rope through the first overhand knot. Tie an overhand knot around the standing part of the first rope with the working end of the second rope.
STEP 3. Tightly dress down each overhand knot and tightly draw the knots together.

Stay Prepared! Stay Alive!

Charlie

Knot Tying- Part 4

Figure-Eight Loop
FIGURE-EIGHT LOOP (FIGURE-EIGHT-ON-A-BIGHT)

The figure-eight loop, also called the figure-eight-on-a-bight, is used to form a fixed loop in a rope. It is a middle of the rope knot.

a. Tying the Knot.

STEP 1. Form a bight in the rope about as large as the diameter of the desired loop.
STEP 2. With the bight as the working end, form a loop in rope (standing part).
STEP 3. Wrap the working end around the standing part 360 degrees and feed the working end through the loop. Dress the knot tightly.

-----------------------------------------------------------------------


Figure-Eight Retrace
FIGURE-EIGHT RETRACE (REROUTED FIGURE-EIGHT)

The figure-eight retrace knot produces the same result as a figure-eight loop. However, by tying the knot in a retrace, it can be used to fasten the rope to trees or to places where the loop cannot be used. It is also called a rerouted figure-eight and is an anchor knot.

a. Tying the Knot.

STEP 1. Use a length of rope long enough to go around the anchor, leaving enough rope to work with.
STEP 2. Tie a figure-eight knot in the standing part of the rope, leaving enough rope to go around the anchor. To tie a figure-eight knot form a loop in the rope, wrap the working end around the standing part, and route the working end through the loop. The finished knot is dressed loosely.
STEP 3. Take the working end around the anchor point.
STEP 4. With the working end, insert the rope back through the loop of the knot in reverse.
STEP 5. Keep the original figure eight as the outside rope and retrace the knot around the wrap and back to the long-standing part.
STEP 6. Remove all unnecessary twists and crossovers; dress the knot down.
----------------------------------------------------------------------


Figure-Eight Slip Knot
FIGURE-EIGHT SLIP KNOT

The figure eight slip knot forms an adjustable bight in a rope. It is a specialty knot.

a. Tying the Knot.

STEP 1. Form a 12-inch bight in the end of the rope.
STEP 2. Hold the center of the bight in the right hand. Hold the two parallel ropes from the bight in the left hand about 12 inches up the rope.
STEP 3. With the center of the bight in the right hand, twist two complete turns clockwise.
STEP 4. Reach through the bight and grasp the long, standing end of the rope. Pull another bight (from the long standing end) back through the original bight.
STEP 5. Pull down on the short working end of the rope and dress the knot down.
STEP 6. If the knot is to be used in a transport tightening system, take the working end of the rope and form a half hitch around the loop of the figure eight knot.

Stay Prepared! Stay Alive!

Charlie